When you switch from Gmail to a new e-mail service, you can set up automatic e-mail forwarding to get your e-mail to your new inbox. This way you can at your own pace, when you have time, update your contacts, those whose mails you wish to recieve, and you can do it when it suites you. In the mean time you won’t have to worry about missing any mails.
Step 1: Open Gmail settings
Click the gear icon, then choose See all settings.
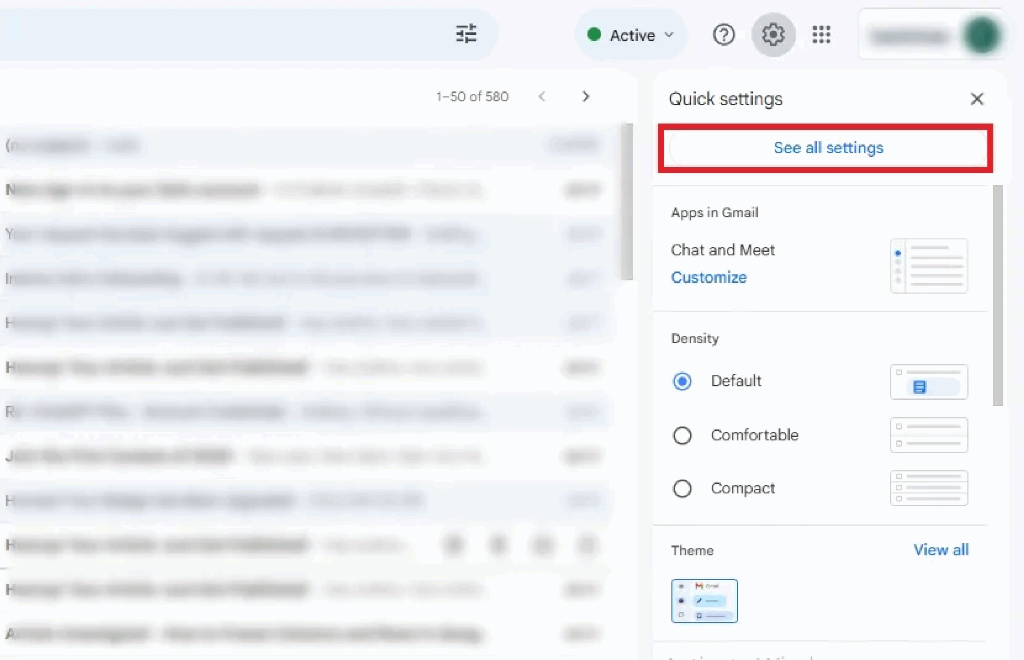
Open Gmail settings
Step 2: Add a forwarding address
Go to the Forwarding and POP/IMAP tab, click Add a forwarding address, and enter the recipient’s email.
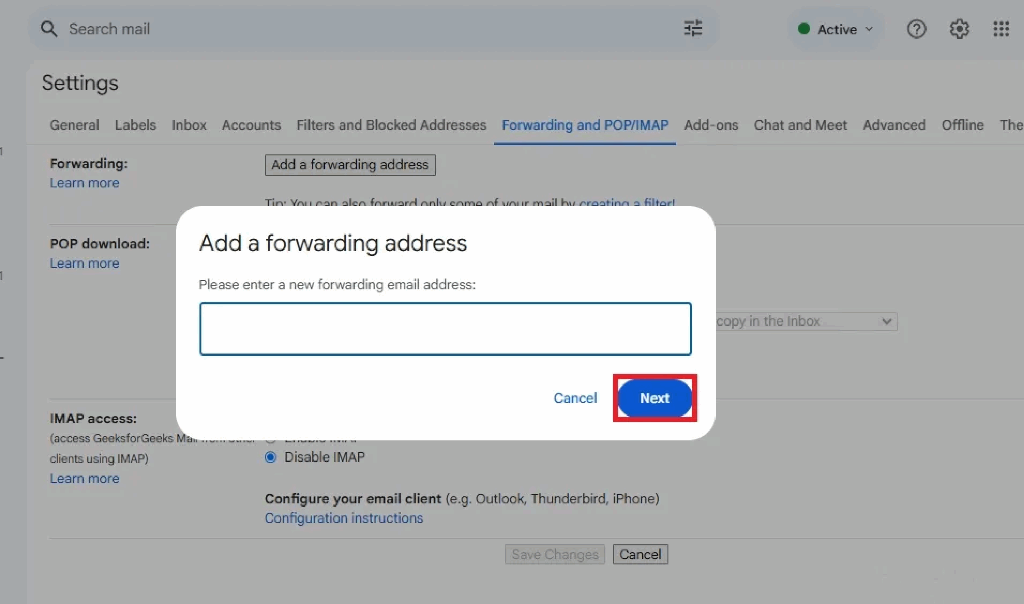
Add a forwarding address
Step 3: Confirm and enable
Follow the email confirmation link sent to the recipient and enable forwarding in Gmail settings.
Pro Tips for Gmail Forwarding: Always test automatic forwarding by sending a sample email to ensure it works correctly. Use filters to forward only high-priority messages and avoid clutter. Keep an eye on your Google storage, as large attachments can fill it up quickly.
